

この記事はAndroidスマホ用のアプリ開発の中で、
今後の開発で再使用性が高いと思われるコーディングをまとめたものです。
Javaでの開発経験、XML構文規則、Androidのアプリ開発経験がある方を対象としています。
Androidのアプリ開発でお役にたててれば、嬉しいです。
(これからAndroidのアプリ開発やJavaでの開発を始めたい方への案内は、記事の最後で紹介します)
サポートが終了したFFmpegKitを16KBのページサイズに対応する
As of January 6, 2025, FFmpegKit is officially retired.

FFmpegKitの16KBのページサイズ対応版
サポートが終了したFFmpegKitですが、16KBのページサイズに対応(フォーク)したソースが入手可能です。
こちらのクローンを使って、16KBのページサイズ対応版のFFmpegKitを作成する手順を紹介します。
環境構築
FFmpegKitのビルド環境として、Linux(Ubuntu)を使用します。
Ubuntu以外のLinuxを使用する場合、コマンド(apt)を読み替えてください。
ユーザホーム(任意)でターミナルを開きます。
※ユーザホーム(/home/jiseifirm)
必要パッケージのインストール
アップデートが可能なパッケージのリストを更新します。
sudo apt update「 …公開鍵を利用できないため、以下の署名は検証できませんでした: NO_PUBKEY xxxxxxxxxxxxxxx 」が表示される場合、公開鍵をキーサーバーから取得します。
sudo apt-key adv --keyserver keyserver.ubuntu.com --recv-keys xxxxxxxxxxxxxxx
sudo apt update
パッケージマネージャで必要パッケージをインストールします。
sudo apt install -y autoconf automake libtool pkg-config curl git doxygen nasm cmake gcc gperf texinfo yasm bison autogen wget autopoint meson ninja-build ragel groff gtk-doc-tools git libtasn1–6-devlibtasn1–6-devがインストールできない場合、以下のサイトからダウンロードします。

Java (JDK)のインストール
パッケージマネージャでOpenJDK 17をインストールします。
sudo apt install -y openjdk-17-jdkAndroid SDKのインストール
mkdir Android
cd Android
wget https://dl.google.com/android/repository/commandlinetools-linux-13114758_latest.zip -O sdk.zip
unzip sdk.zip
rm sdk.zip
mv cmdline-tools Sdksdkmanagerで必要なパッケージをインストールします。
./Sdk/bin/sdkmanager --sdk_root=/home/jiseifirm/Android/Sdk "platform-tools" "platforms;android-33" "build-tools;33.0.1"Android NDKのインストール
sdkmanagerからインストールできるNDK r25は16KBのページサイズに対応していません。
16KBのページサイズに対応しているNDK r25はAndroid CIで入手可能です。

ダウンロードしたファイルを解凍します。
unzip android-ndk-12161346-linux-x86_64.zipffmpeg-kit-16KBのクローン
git clone https://github.com/AliAkhgar/ffmpeg-kit-16KB.gitビルド
FFmpegKitのクローン先(フォルダ)でターミナルを開きます。
ターミナルで環境編集を設定、ビルドを実行します。
ビルドは10~20分ぐらいかかります。
ビルド対象のアーキテクチャ毎にコマンド入力待ちになります。
環境変数の設定
ビルド用シェル(android.sh)の実行で必要な環境変数を設定します。
SDKとNDKのルートフォルダをANDROID_SDK_ROOT、ANDROID_NDK_ROOTに設定します。
JavaをJAVA_HOMEとPATHに追加します。
※ユーザホーム(/home/jiseifirm)
export ANDROID_SDK_ROOT="/home/jiseifirm/Android/Sdk"
export ANDROID_NDK_ROOT="/home/jiseifirm/Android/android-ndk-r25d-canary"
export JAVA_HOME="/usr/lib/jvm/java-17-openjdk-amd64"
export PATH="$JAVA_HOME/bin:$PATH"
ビルドの実行
シェルオプションを確認します。
./android.sh --help


Usage: ./android.sh [OPTION]... [VAR=VALUE]...

Specify environment variables as VARIABLE=VALUE to override default build options.

Options:
  -h, --help			display this help and exit
  -v, --version			display version information and exit
  -d, --debug			build with debug information
  -s, --speed			optimize for speed instead of size
  -f, --force			ignore warnings
  -l, --lts			    build lts packages to support API 16+ devices
      --api-level=api	override Android api level
      --no-ffmpeg-kit-protocols	disable custom ffmpeg-kit protocols (saf)

Licensing options:
  --enable-gpl			allow building GPL libraries, created libs will be licensed under the GPLv3.0 [no]

Architectures:
  --disable-arm-v7a		 do not build arm-v7a architecture [yes]
  --disable-arm-v7a-neon do not build arm-v7a-neon architecture [yes]
  --disable-arm64-v8a	 do not build arm64-v8a architecture [yes]
  --disable-x86			 do not build x86 architecture [yes]
  --disable-x86-64		 do not build x86-64 architecture [yes]

Libraries:
  --full			enables all external libraries
  --enable-android-media-codec	build with built-in Android MediaCodec support [no]
  --enable-android-zlib	build with built-in zlib support [no]
  --enable-chromaprint	build with chromaprint [no]
  --enable-dav1d		build with dav1d [no]
  --enable-fontconfig	build with fontconfig [no]
  --enable-freetype		build with freetype [no]
  --enable-fribidi		build with fribidi [no]
  --enable-gmp			build with gmp [no]
  --enable-gnutls		build with gnutls [no]
  --enable-kvazaar		build with kvazaar [no]
  --enable-lame			build with lame [no]
  --enable-libaom		build with libaom [no]
  --enable-libass		build with libass [no]
  --enable-libiconv		build with libiconv [no]
  --enable-libilbc		build with libilbc [no]
  --enable-libtheora	build with libtheora [no]
  --enable-libvorbis	build with libvorbis [no]
  --enable-libvpx		build with libvpx [no]
  --enable-libwebp		build with libwebp [no]
  --enable-libxml2		build with libxml2 [no]
  --enable-opencore-amr	build with opencore-amr [no]
  --enable-openh264		build with openh264 [no]
  --enable-openssl		build with openssl [no]
  --enable-opus			build with opus [no]
  --enable-sdl			build with sdl [no]
  --enable-shine		build with shine [no]
  --enable-snappy		build with snappy [no]
  --enable-soxr			build with soxr [no]
  --enable-speex		build with speex [no]
  --enable-srt			build with srt [no]
  --enable-tesseract	build with tesseract [no]
  --enable-twolame		build with twolame [no]
  --enable-vo-amrwbenc	build with vo-amrwbenc [no]
  --enable-zimg			build with zimg [no]

GPL libraries:
  --enable-libvidstab	build with libvidstab [no]
  --enable-rubberband	build with rubber band [no]
  --enable-x264			build with x264 [no]
  --enable-x265			build with x265 [no]
  --enable-xvidcore		build with xvidcore [no]

Custom libraries:
  --enable-custom-library-[n]-name=value			name of the custom library []
  --enable-custom-library-[n]-repo=value			git repository of the source code []
  --enable-custom-library-[n]-repo-commit=value		git commit to download the source code from []
  --enable-custom-library-[n]-repo-tag=value		git tag to download the source code from []
  --enable-custom-library-[n]-package-config-file-name=value	package config file installed by the build script []
  --enable-custom-library-[n]-ffmpeg-enable-flag=value	library name used in ffmpeg configure script to enable the library []
  --enable-custom-library-[n]-license-file=value		licence file path relative to the library source folder []
  --enable-custom-library-[n]-uses-cpp				flag to specify that the library uses libc++ []

Advanced options:
  --reconf-LIBRARY		run autoreconf before building LIBRARY [no]
  --redownload-LIBRARY	download LIBRARY even if it is detected as already downloaded [no]
  --rebuild-LIBRARY		build LIBRARY even if it is detected
必要なオプションを指定してシェルを実行します。
android-media-codecとandroid-zlibは必須です。
オーディオコーディックでlibmp3lameを使用しているので、lameを指定します。
./android.sh --enable-android-media-codec --enable-android-zlib --enable-lameビルドしたライブラリ(ffmpeg-kit.aar)は以下のフォルダに出力されます。
※ユーザホーム(/home/jiseifirm)
/home/jiseifirm/ffmpeg-kit-16KB/android/ffmpeg-kit-android-lib/build/output/aar
16KBのページサイズ対応版の適用
mavenリポジトリのFFmpegKitを16KBのページサイズ対応版(ffmpeg-kit.aar)に変更します。
ビルドライブラリの格納
プロジェクトフォルダ配下の\app\libsにffmpeg-kit.aarを格納します。
libsファルダが存在しない場合はフォルダを新規作成します。
build.gradle(モジュール)の修正
ライブラリのインポート先をmavenリポジトリからローカルに変更します。
変更前
dependencies {
	:
    implementation 'com.arthenica:ffmpeg-kit-full:6.0-2'
}
変更後
dependencies {
	:
    implementation files('libs/ffmpeg-kit.aar')
}
動作確認
FFmpegKitを使用している部分を動作確認します。
FFmpegKitを使用している部分のサンプル
    :
    // mp3ファイル変換
    String aif = FFmpegKitConfig.getSafParameterForRead(context, contentUri);
    String mp3 = context.getExternalFilesDir(Environment.DIRECTORY_DOCUMENTS) + File.separator + file;
    FFmpegSession session = FFmpegKit.execute(String.format(Locale.getDefault(), "-i '%s' -f mp3 -acodec libmp3lame -ab %d -ar %d '%s'", aif, 192000, 44100, mp3));
    if (ReturnCode.isSuccess(session.getReturnCode())) {
        // 変換成功
        :
    }
:オーディオコーディックでlibmp3lameを使用して、aifファイルからmp3ファイルに変換します。
ネイティブデバッグシンボル
NDKライブラリを含むアプリはネイティブデバッグシンボルをApp Bundleに含めることを推奨しています。
デバッグシンボルファイルはビルド時に作成することが可能です。
デバッグシンボルファイルの作成
クローンしたFFmpegKitのbuild.gradle(モジュール)に以下の記述を追加します。
buildTypes {
        release {
            :
            ndk {
                debugSymbolLevel 'SYMBOL_TABLE'
            }
        }
}FFmpegKitをビルドします。
ターミナルからデバッグシンボルファイルを作成(圧縮)します。
cd /home/jiseifirm/ffmpeg-kit-16KB/android/ffmpeg-kit-android-lib/build/intermediates/merged_native_libs/release/out/lib
zip -r native-debug-symbols.zip arm64-v8a armeabi-v7a x86 x86_64
ネイティブデバッグシンボルのリリース
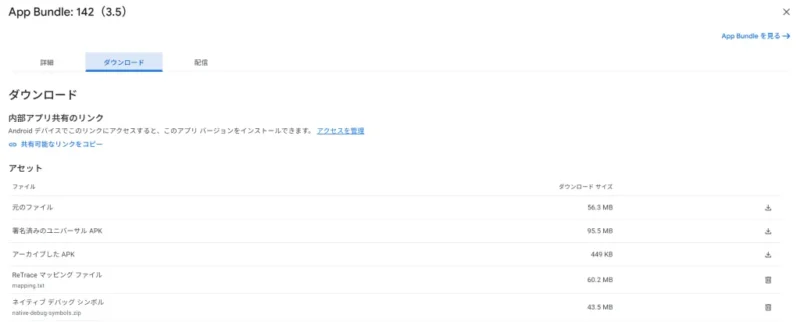
ネイティブデバッグシンボルのリリースは、App Bundleのダウンロードから行います。
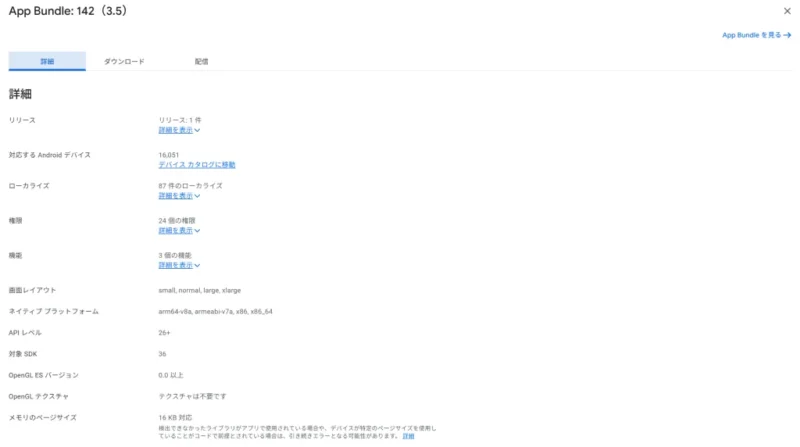
作成したネイティブデバッグシンボルファイル(native-debug-symbols.zip)をアップロードします。
今回は、ここまでです。
ポータブル電源+太陽光発電の組み合わせ、最強です♪
誤字脱字、意味不明でわかりづらい、
もっと詳しく知りたいなどのご意見は、
このページの最後にあるコメントか、
こちらから、お願いいたします♪
ポチッとして頂けると、
次のコンテンツを作成する励みになります♪
これからAndroidのアプリ開発やJavaでの開発を始めたい方へ
アプリケーション開発経験がない方や、アプリケーション開発経験がある方でも、JavaやC#などのオブジェクト指向言語が初めての方は、Androidのアプリ開発ができるようになるには、かなりの時間がかかります。
オンラインスクールでの習得を、強くおススメします。
未経験者からプログラマーを目指すのに最適です。まずは無料カウンセリングから♪

ゲーム系に強いスクール、UnityやUnrealEngineを習得するのに最適です。まずは無料オンライン相談から♪

参考になったら、💛をポッチとしてね♪
コメント欄