
この記事はAndroidスマホ用のアプリ開発の中で、
今後の開発で再使用性が高いと思われるコーディングをまとめたものです。
Javaでの開発経験、XML構文規則、Androidのアプリ開発経験がある方を対象としています。
Androidのアプリ開発でお役にたててれば、嬉しいです。
(これからAndroidのアプリ開発やJavaでの開発を始めたい方への案内は、記事の最後で紹介します)
PCで作業するときは、やっぱり有線のヘッドフォンです♪
◎テーマ
Activity の画面遷移をいろいろな方法で実装する
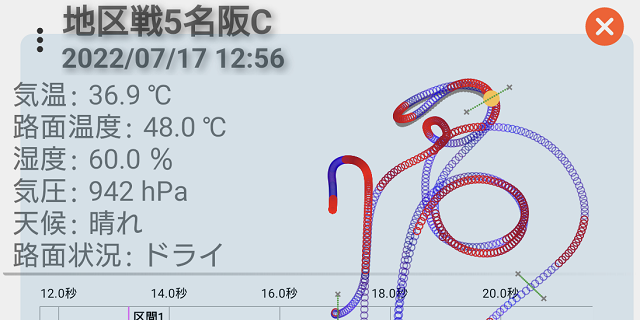
下記の動画は、GPS走行解析アプリ(Archive Pro)の画面遷移をフォーカスした動画です。
メニュー、アイコンボタン、Back キー(戻るボタン)のタップ操作、スワイプ操作をトリガーに画面遷移しています。
Activity間の画面遷移では、異なる画面から遷移してきた画面から戻る際に正しい遷移元の画面に戻る、元の画面に戻ってきた際に一覧表示の表示状態を維持する実装などがポイントとなります。
◎ポイント
アプリケーションの画面構成を考えた場合、複数ある画面を Activity とする構成、シングルページアプリケーションのように Fragment とする構成、この2つの構成があります。
Activity と Fragment のそれぞれの画面遷移を考えた場合、Fragment で構成した場合では、親にあたる Activity を経由した画面間の値の受け渡しが可能となりますが、Activity で構成した場合では、画面間の値の受け渡しはIntentを使用する必要があります。
今回は、複数ある画面を Activity で構成した場合で、いろいろな画面遷移を解説したいと思います。
RecyclerViewのアイテムクリックによる画面遷移
RecyclerView(motionView)の setOnItemClickListener に画面遷移の処理を記述します。
①スクロール位置を取得します。
②取得したスクロール位置を Bundle に保存します。
③遷移先のクラス(Activity)と遷移先の画面に渡す情報(選択した走行データのシーケンス)とBundle をセットした Intent を作成します。
④作成した Intent を引数として、遷移先の Activity を開始します。
⑤画面遷移のアニメーションを開始します。
⑥ Activity を終了します。
        :
      private Bundle SaveCondition(Bundle bundle) {
          :
          bundle.putString("motionPos",String.valueOf(motionPos));
          return bundle;
      }
    :
        motionView.setOnItemClickListener((view, position) -> {
                // スクロール位置取得
                RecyclerView.LayoutManager layoutManager = motionView.getLayoutManager();
                if (layoutManager instanceof LinearLayoutManager)
                    motionPos = ((LinearLayoutManager)layoutManager).findFirstVisibleItemPosition();
                else
                    motionPos = 0;
                Intent intent = new Intent(context, MotionDetailActivity.class);
                intent.putExtras(SaveCondition(new Bundle()));
                intent.putExtra("MOTION", motionList.get(position).getSequence());
                startActivity(intent);
                overridePendingTransition(R.anim.slide_from_right, R.anim.slide_to_left);
                finish();
        });
        :
スワイプ操作による画面遷移
スワイプ操作の検出と動作を GestureDetector の onFling に記述します。
左方向のスワイプで前の画面に戻る動作、右方向のスワイプで次の画面に進む動作としています。
  :
    private GestureDetector         gestureDetector;
    private static final int        SWIPE_MIN_DISTANCE = 100;
    :
    // スワイプ用イベントハンドラ //
    @Override
    public boolean onTouchEvent(MotionEvent event) {
        return gestureDetector.onTouchEvent(event);
    }
    :
    // スワイプ
    gestureDetector = new GestureDetector(this, new GestureDetector.SimpleOnGestureListener() {
            @Override
            public boolean onFling(MotionEvent beforeEvent, MotionEvent afterEvent, float velocityX, float velocityY) {
                Intent intent1;
                if (afterEvent.getX() - beforeEvent.getX() > SWIPE_MIN_DISTANCE) {
                    intent1 = new Intent(context, MotionListActivity.class);
                    intent1.putExtras(bundle);
                    startActivity(intent1);
                    overridePendingTransition(R.anim.slide_from_left, R.anim.slide_to_right);
                    finish();
                }
                if (beforeEvent.getX() - afterEvent.getX() > SWIPE_MIN_DISTANCE) {
                    Intent intent1 = new Intent(context, CheckerAddActivity.class);
                    intent1.putExtras(bundle);
                    startActivity(intent1);
                    overridePendingTransition(R.anim.slide_from_right, R.anim.slide_to_left);
                    finish();
                }
                return false;
            }
        });
実装の詳細については、下記の参考リンクを参照ください。

Backキー(戻るボタン)による画面遷移
Backキー検出と動作は、onBackPressed に記述します。
Backキーの動作として、画面上に配置した閉じるボタンのクリックイベントを perfomClick を使用して呼び出します。
  :
    private ImageView               back;
  :
    @Override
    public void onBackPressed() {
        back.performClick();
    }
    :
    back = findViewById(R.id.back);
    back.setOnClickListener(v -> {
            Intent intent1 = new Intent(context, MotionListActivity.class);
            intent.putExtras(bundle);
            startActivity(intent1);
            overridePendingTransition(R.anim.slide_from_left, R.anim.slide_to_right);
            finish();
        });
: Android14対応(非推奨のonBackPressedの対応)
画面に戻ってきた際に一覧の表示状態を維持する
Bundle に保存されているスクロール位置を取り出して、RecyclerView(motionView)のスクロール位置を復元します。
  :
    private void RestoreCondition(Bundle bundle) {
    :
        motionPos = Integer.parseInt(bundle.getString("motionPos"));
    }
    :
    @Override
    protected void onCreate(Bundle savedInstanceState) {
        super.onCreate(savedInstanceState);
        // Bundle取得
        Intent intent = getIntent();
        if (intent.getExtras() != null) {
            RestoreCondition(intent.getExtras());
        }
    :
    public void updateDataView(List<AccessFile> newAccessFile) {
        motionList = (ArrayList<AccessFile>) newAccessFile;
        motionAdapter = new VerticalListView.ArrayAdapter(motionList) {
            :
        };
        motionView.setAdapter(motionAdapter);
        motionView.setOnItemClickListener((view, position) -> {
            :
        });
        if (motionList.size() > 0 && motionPos > 0) {
            LinearLayoutManager layoutManager = (LinearLayoutManager) motionView.getLayoutManager();
            if (layoutManager != null)
                layoutManager.scrollToPositionWithOffset(motionPos, 0);
        }
    :
実装の詳細については、下記の参考リンクを参照ください。
異なる画面から遷移してきた場合から遷移元の画面に戻る
異なる画面から遷移してきた場合、遷移元の画面を判断する必要があります。
下記のサンプルでは、遷移先から渡された情報(選択した走行データのシーケンス)と画面に表示している走行データのシーケンスが違う場合で判断しています。
MotionDetailActivity から遷移してきた場合は、走行データのシーケンスが渡される、ItemAddActivity から遷移してきた場合は、走行データをグルーピングしたコースのシーケンスが渡されるため、画面に表示している走行データのシーケンスが違うことを判断の条件としています。
  :
    private Integer                     sequence;
    :
    private ImageView                   back;
    :
        back = findViewById(R.id.back);
        back.setOnClickListener(v -> {
            if (DEBUG) Log.d(TAG, "back:onClick");
            Intent intent1;
            if (intent.getIntExtra("MOTION", 0) == sequence) {
                intent1 = new Intent(context, MotionDetailActivity.class);
                intent1.putExtras(bundle);
                startActivity(intent1);
                overridePendingTransition(R.anim.slide_from_left, R.anim.slide_to_right);
            } else {
                intent1 = new Intent(context, ItemAddActivity.class);
                intent1.putExtras(bundle);
                startActivity(intent1);
                overridePendingTransition(android.R.anim.fade_in, android.R.anim.fade_out);
            }
            finish();
        });
    :
    public void updateMotion(AccessFile motion) {
        if (motion.sequence > 0) {
            sequence = motion.sequence;
    :
今回は、ここまでです。
アプリから直接SNSに投稿するも可能です。実装方法はこちらです↓↓↓

誤字脱字、意味不明でわかりづらい、
もっと詳しく知りたいなどのご意見は、
このページの最後にあるコメントか、
こちらから、お願いいたします♪
ポチッとして頂けると、
次のコンテンツを作成する励みになります♪
これからAndroidのアプリ開発やJavaでの開発を始めたい方へ
アプリケーション開発経験がない方や、アプリケーション開発経験がある方でも、JavaやC#などのオブジェクト指向言語が初めての方は、Androidのアプリ開発ができるようになるには、かなりの時間がかかります。
オンラインスクールでの習得を、強くおススメします。
未経験者からプログラマーを目指すのに最適です。まずは無料カウンセリングから♪

ゲーム系に強いスクール、UnityやUnrealEngineを習得するのに最適です。まずは無料オンライン相談から♪

参考になったら、💛をポッチとしてね♪
コメント欄